How to Clean Tomato Slicer: Easy Steps for Sparkling Results
You love perfectly sliced tomatoes for your sandwiches and salads, but have you ever stopped to think about how clean your tomato slicer really is? A dirty slicer can harbor bacteria and affect the taste and safety of your food.
If you want to keep your slicer in top shape and ensure every slice is fresh and safe, you need to know the right way to clean it. You’ll discover simple, step-by-step tips to clean your tomato slicer quickly and effectively.
Follow these easy instructions to protect your health, extend the life of your slicer, and enjoy perfectly sliced tomatoes every time. Keep reading—you won’t want to miss these expert cleaning secrets!

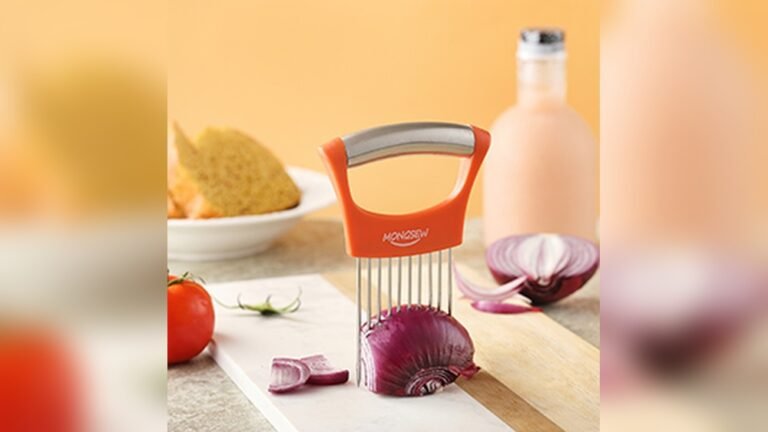
Credit: eur.vevor.com
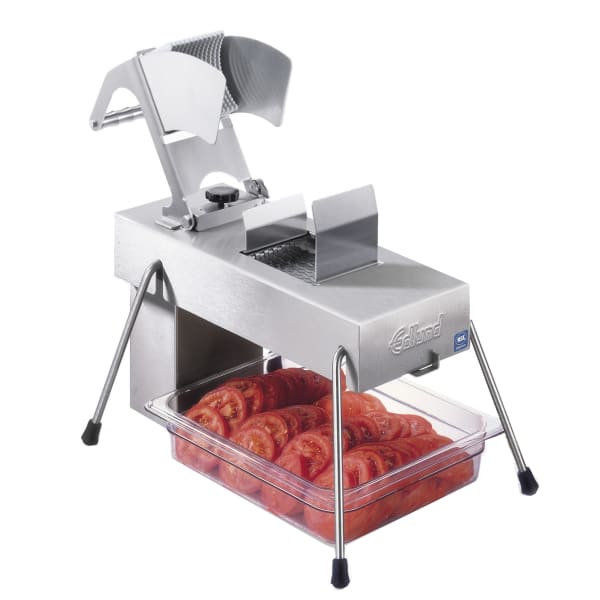
Disassemble The Slicer
Disassembling the tomato slicer is the first step in cleaning it properly. Taking the slicer apart allows you to reach all the nooks and crannies where food particles hide. This prevents mold and bacteria build-up that can affect your food’s safety.
Always follow the manufacturer’s instructions to avoid damaging the slicer. Removing blades and detachable parts carefully ensures safe handling and thorough cleaning.
Remove The Blade Assembly
Start by detaching the blade assembly. Use caution as the blades are sharp. Hold the slicer firmly and unlock the blade cartridge if it has a locking mechanism. Gently lift the blades out without touching the sharp edges.
Detach The Pusher And Food Holder
Next, remove the pusher and food holder. These parts press the tomato onto the blades. They usually slide or snap off easily. Removing them lets you clean areas hidden during use.
Separate Additional Removable Parts
Check for other removable parts like trays or guards. Take off all parts that come away without force. This ensures every surface can be cleaned thoroughly.
Remove Food Debris
Removing food debris from your tomato slicer is essential for hygiene and performance. Food particles can stick to blades and parts, causing rust and dullness. Cleaning immediately after use prevents buildup and keeps the slicer safe.
Focus on clearing stuck tomato pieces and seeds from every corner. This step makes washing easier and more effective. A clean slicer also reduces the risk of bacteria growth, ensuring fresh and healthy food preparation.
Disassemble The Tomato Slicer
Remove all detachable parts carefully. Separate the blade assembly, pusher, and other removable components. This allows better access to hidden food debris. Follow the manufacturer’s instructions to avoid damage.
Use A Soft Brush To Scrub
Use a soft brush to scrub blades and crevices gently. Avoid harsh scrubbing that can dull blades. Brush from the unsharpened side to protect yourself. This removes stuck tomato bits without harming the slicer.
Rinse With Warm Water
Rinse all parts under warm running water. Warm water helps to loosen food residues effectively. Hold parts at different angles to flush out trapped debris. This step prepares the slicer for thorough washing.
Check For Remaining Debris
Inspect blades and corners for leftover food particles. Use a toothpick or small brush for tight spots. Removing all debris prevents mold and odors. Repeat scrubbing and rinsing if needed.
Wash Removable Parts
Cleaning your tomato slicer starts with washing all removable parts. This step helps remove food particles and juice that stick after slicing. Proper cleaning prevents bacteria buildup and keeps the slicer working well.
Take your time to separate each detachable piece. Handle blades carefully to avoid cuts. Washing parts thoroughly ensures a safer and cleaner slicer for your next use.
Use Warm, Soapy Water
Fill a basin with warm water and add a mild dish soap. Warm water helps break down grease and tomato residue easily. Soak the removable parts for a few minutes to loosen stuck bits.
Use a soft cloth or sponge to clean each piece gently. Avoid harsh chemicals that can damage the slicer or leave harmful residues. Wash all surfaces, including tight corners where food can hide.
Scrub Carefully Around Blades
Blades are sharp and require careful handling. Use a soft brush to clean blades from the back or unsharpened side. Scrubbing this way protects your fingers and keeps blades sharp longer.
Remove any pulp or seeds stuck between blades. Rinse thoroughly with clean water to remove all soap and debris. Allow blades to air dry completely before reassembling the slicer.

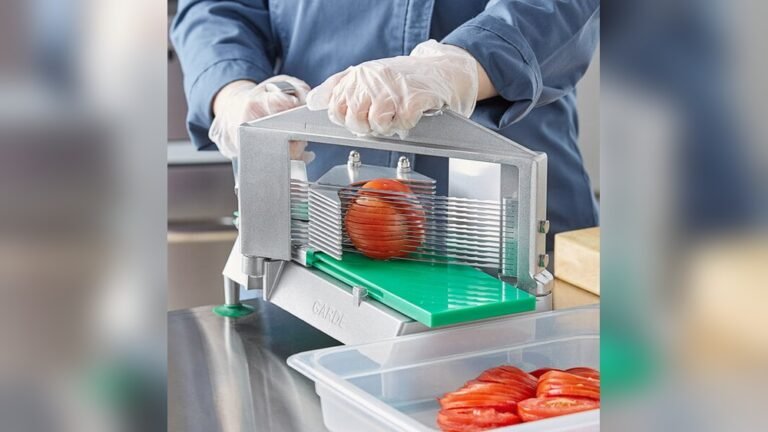
Credit: www.webstaurantstore.com
Rinse Thoroughly
Rinsing thoroughly is a crucial step in cleaning your tomato slicer. It removes all soap, food particles, and residue left after scrubbing. Proper rinsing ensures no harmful bacteria remain on the slicer. Use clean, running water to rinse each part carefully. Pay special attention to the blades and crevices where food can hide. This step keeps your slicer safe and ready for the next use.
Use Warm Running Water
Warm water helps dissolve fats and food bits better than cold water. Hold each part under warm running water for at least 20 seconds. Move parts around to rinse every surface. This ensures no soap or tomato juice stays behind.
Check All Nooks And Crannies
Tomato slicers have tight spaces that trap food. Look closely at blade joints and handles. Use a soft brush or cloth to help rinse these spots. Do not rush this step. Clean corners stop mold and bacteria growth.
Rinse Blades Safely
Blades are sharp and need careful rinsing. Hold blades by the dull edge or handle. Avoid running your fingers across the sharp side. Use a gentle stream of water to wash off any stuck tomato seeds or pulp.
Final Inspection Before Drying
After rinsing, check each part under light. Look for any leftover soap or food pieces. If you see any, rinse again. A clean slicer dries faster and stays hygienic. Thorough rinsing protects your health and your slicer’s life.
Sanitize Components
Sanitizing the components of your tomato slicer is essential to keep it safe and hygienic. This process removes bacteria and food residue that regular washing might miss. Proper sanitization helps prevent contamination and extends the life of your slicer.
Focus on each part carefully. Use the right cleaning agents and methods to ensure every component is sanitized without damage.
Disassemble The Slicer Parts
Take apart all removable parts of the tomato slicer. Separate the blade cartridge, pusher assembly, and any other pieces. Follow the manufacturer’s instructions carefully to avoid damaging the slicer.
Use A Food-safe Sanitizer
Prepare a food-safe sanitizer solution. You can use diluted bleach or a commercial sanitizer made for kitchen tools. Soak the parts for the recommended time to kill germs effectively.
Scrub And Rinse Thoroughly
Use a soft brush to scrub each component, especially around the blades. Clean from the back or unsharpened side to avoid injury. Rinse all parts with clean water to remove sanitizer and debris completely.
Place all sanitized parts on a clean towel or drying rack. Allow them to air dry fully before reassembling. Moisture left on the slicer can cause rust and bacteria growth.
Air Dry Completely
Let all parts dry fully in open air after washing. Avoid using towels to prevent moisture buildup. Complete drying stops rust and keeps your tomato slicer safe.
Why Air Drying Matters
Air drying your tomato slicer is essential after washing. It stops moisture from staying on metal parts. Moisture can cause rust and damage the slicer over time. It also helps avoid bacteria growth on damp surfaces. Letting the slicer dry fully keeps it safe and clean for the next use.
Best Way To Air Dry Your Tomato Slicer
Place all parts on a clean dish rack or towel. Arrange the blades and small pieces separately for better airflow. Keep the slicer parts in a well-ventilated area. Avoid covering them or placing them in a closed cabinet. The open air helps water evaporate faster.
Tips For Faster Drying
Use a dry cloth to wipe excess water first. This reduces drying time significantly. Turn the parts occasionally to expose all surfaces to air. If possible, dry near a fan or open window. Avoid using a cloth to dry blades directly to prevent cuts.
Lubricate Moving Parts
Lubricating the moving parts of your tomato slicer keeps it working smoothly. Regular lubrication reduces friction and wear on the slicer’s components. It helps maintain the slicer’s precision and extends its life. Proper lubrication also prevents rust and corrosion in the moving joints. Always use the right type of oil to avoid food contamination.
Use Food-grade Oil
Choose food-grade oil for lubricating your tomato slicer. This oil is safe for use on kitchen tools that touch food. It does not contain harmful chemicals or toxins. Apply a small amount of food-grade oil to the sliding joints and hinges. Wipe off any excess oil with a clean cloth. Doing this after every cleaning keeps the slicer running smoothly and safely.
Avoid Vegetable Oil
Do not use vegetable oil to lubricate your tomato slicer. Vegetable oil can become sticky and rancid over time. It attracts dust and dirt, which can clog the moving parts. Using vegetable oil may cause unpleasant smells and affect the slicer’s performance. Stick to food-grade oils designed for kitchen equipment to ensure cleanliness and safety.
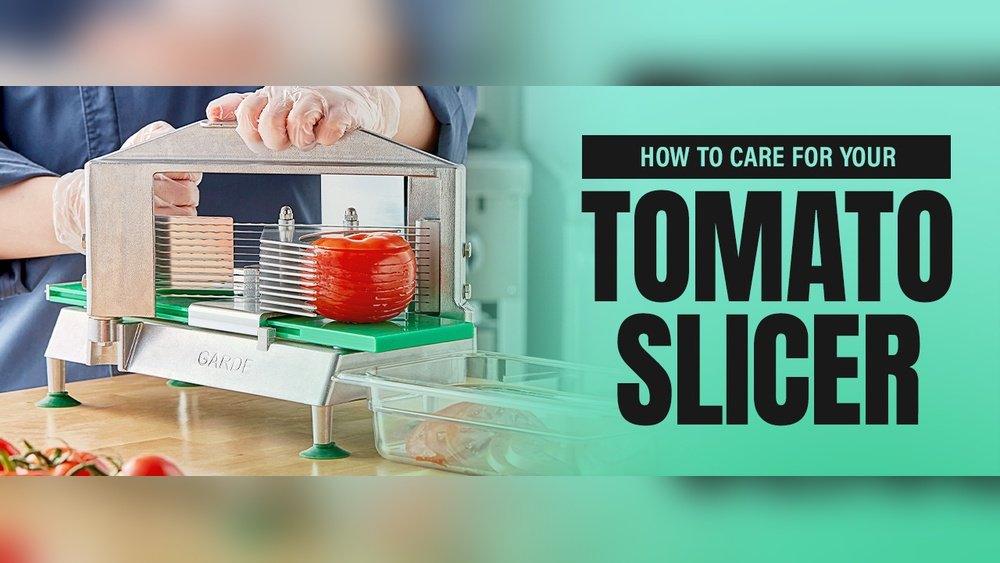
Credit: www.wasserstrom.com
Reassemble The Slicer
After cleaning and drying all parts, it is time to put your tomato slicer back together. Proper reassembly ensures the slicer works safely and smoothly. Follow each step carefully to avoid damage or injury.
Handle the blades with care during this process. Sharp edges can cause cuts if not treated cautiously. Make sure every piece fits snugly and securely.
Align The Blade Cartridge
Start by placing the blade cartridge in its correct position. Check that the blades face the right direction. A misaligned cartridge can cause uneven slices or damage the slicer.
Press the cartridge gently until it clicks or fits firmly in place. Avoid forcing it, which may bend or break the blades.
Attach The Pusher Assembly
Next, attach the pusher assembly that holds the tomato during slicing. Align it with the slider track carefully. The pusher should move smoothly back and forth without resistance.
Secure any locking mechanisms or screws to keep the pusher stable. Loose parts can lead to unsafe operation or poor slicing results.
Check For Loose Parts
After assembling, check all parts for stability. Wiggle the blades and pusher to ensure nothing shifts or rattles. Tighten screws and locks if needed.
Properly tightened parts improve safety and extend the slicer’s lifespan. Your tomato slicer is now ready for use again.
Daily Cleaning Routine
Keeping your tomato slicer clean every day helps maintain its performance. Daily cleaning stops food residue from building up. It also prevents rust and keeps your slicer safe for use.
Following a simple routine after each use ensures your slicer stays in top shape. This routine takes just a few minutes but makes a big difference.
Disassemble The Tomato Slicer
Start by carefully taking apart the slicer. Remove blades and any detachable parts. Check the user manual for specific steps. Handle the blades with care to avoid cuts.
Use warm, soapy water to clean all removable parts. A soft brush helps remove stuck tomato pieces. Clean from the back or unsharpened side of blades only. Rinse parts well with clean water.
Clean The Main Body
Wipe the slicer’s main body with a damp cloth. Avoid soaking this part to protect its mechanical components. Dry it completely with a soft towel. This keeps moisture from causing rust.
Sanitize And Dry
Use a food-safe sanitizer on all parts if needed. Let the parts air dry fully before putting them back. Moisture left on blades or parts can cause rust and spoil tomatoes.
Apply food-grade oil to sliding or moving parts. This keeps the slicer working smoothly. Use only a small amount to avoid attracting dirt or grime.
Avoid Dishwasher Use
Dishwashers seem convenient for cleaning kitchen tools. Avoid using them for your tomato slicer. The dishwasher’s harsh environment can damage the slicer’s blades and parts.
High heat and strong detergents may dull or rust the blades. The slicer’s delicate components can warp or break. Hand washing keeps your slicer sharp and safe longer.
Protect The Blades From Damage
Dishwashers cause blades to bump against other items. This can chip or dull the sharp edges quickly. Washing by hand lets you control how gently the blades are handled. Use a soft brush to clean carefully.
Prevent Rust And Corrosion
Dishwasher water and detergent may leave the slicer wet inside. Moisture trapped in joints causes rust. Hand drying after washing prevents water damage. Wipe parts dry with a soft cloth.
Preserve The Slicer’s Moving Parts
Dishwashers can loosen or damage moving parts. The slicer’s slide and hinge need gentle care. Hand washing helps keep these parts working smoothly. Lubricate with food-safe oil after drying.
Frequently Asked Questions
How To Clean A Tomato Slicer?
Disassemble the tomato slicer and soak parts in warm, soapy water. Scrub blades carefully from the unsharpened side. Rinse thoroughly, sanitize if needed, and air dry completely. Lubricate sliding parts with food-grade oil before reassembling for smooth operation.
What Is The Correct Way To Clean And Sanitize A Slicer?
Disassemble the slicer and remove blades. Wash all parts with warm, soapy water using a soft brush. Rinse thoroughly. Sanitize with food-safe sanitizer. Air dry completely before reassembling. Lubricate sliding parts with food-grade oil for smooth operation. Clean regularly to prevent contamination and rust.
How To Clean A Vegetable Slicer?
Disassemble the slicer and remove blades. Wash parts in warm, soapy water using a brush away from sharp edges. Rinse thoroughly and air dry completely. Sanitize if desired. Lubricate sliding parts with food-grade oil. Reassemble the slicer carefully before use.
What Is The Best Cleaner For Deli Slicers?
The best cleaner for deli slicers is warm, soapy water with a soft brush. Use food-safe sanitizer for extra safety. Avoid harsh chemicals. Always clean blades from the unsharpened side and air dry parts completely before reassembling. Apply food-grade oil to sliding parts for smooth operation.
Conclusion
Cleaning your tomato slicer regularly keeps it safe and working well. Always take it apart carefully before washing each piece. Use warm, soapy water and a soft brush to remove food bits. Be gentle near the sharp blades to avoid injury.
Rinse all parts thoroughly and let them dry fully to stop rust. Lubricate moving parts with food-safe oil for smooth slicing. Following these simple steps makes your slicer last longer and stay clean. A clean slicer helps you prepare fresh tomatoes easily every time.