Best Maintenance Tips for Can Opener for Longevity
Your can opener is a small but mighty kitchen tool that deserves a little extra care. If you’ve ever struggled with a rusty, sticky, or hard-to-turn can opener, you know how frustrating it can be.
But here’s the good news: with a few simple maintenance tips, you can keep your can opener working smoothly and safely every time you need it. You’ll discover easy ways to clean, lubricate, and store your can opener so it lasts longer and feels like new.
Keep reading—you’ll be opening cans effortlessly in no time!
Daily Cleaning Routine
Keeping your can opener clean every day ensures it works well and lasts longer. A simple daily routine stops food bits from building up. It also prevents rust and keeps the opener safe to use. Follow these easy steps after each use to maintain your can opener.
Washing After Each Use
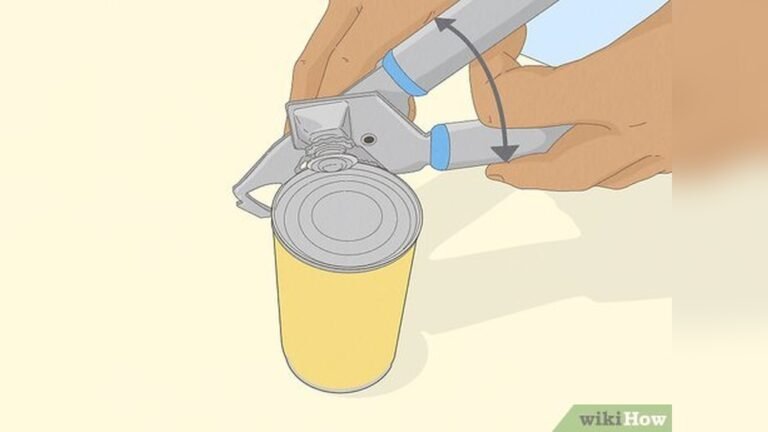
Rinse the can opener under warm water right after using it. Use a small brush or sponge with mild soap to clean the blades and gears. Make sure to remove all food particles. Avoid soaking the whole opener if it has a wooden handle. Washing daily stops food from hardening and keeps the opener fresh.
Removing Food Residue
Check the cutting wheel and gears for stuck food. Use a toothbrush or toothpick to gently scrape away residue. Pay close attention to tiny crevices where food can hide. Removing residue prevents bad smells and keeps the opener sharp. This quick step improves the opener’s performance every time.
Drying Techniques To Prevent Rust
Dry the can opener thoroughly after washing. Use a clean towel to wipe all parts, especially the metal areas. Leave the opener open on a dry surface to air dry completely. This allows air to reach all parts and stops rust from forming. Proper drying is key to keeping your can opener in top shape.
Credit: www2.parklanejewelry.com
Deep Cleaning Methods
Deep cleaning a can opener keeps it safe and working smoothly. Food residue and grime can build up over time. Cleaning deeply removes hidden dirt and prevents rust or bacteria. This section covers easy and effective ways to deep clean your can opener.
Soaking In Vinegar
Vinegar is great for loosening stuck-on food and rust. Fill a bowl with white vinegar. Submerge the metal parts of the can opener for 10-15 minutes. After soaking, scrub gently with a soft brush or cloth. Rinse thoroughly with warm water and dry well. This method helps remove grime and light rust.
Using Baking Soda For Stubborn Grime
Baking soda is a mild abrasive that cleans without scratching. Make a paste with baking soda and water. Apply it to the can opener’s blade and gears. Let it sit for 5-10 minutes. Use an old toothbrush to scrub away stubborn dirt. Rinse with warm water and dry completely. Baking soda helps break down tough residues.
Sanitizing With Disinfectants
Sanitizing kills germs and keeps your can opener hygienic. Use a food-safe disinfectant spray or wipe. Apply it to all parts of the can opener, especially the blade. Let it sit for the time recommended on the product label. Wipe off any excess and allow the opener to air dry. This step ensures your can opener stays clean and safe for use.
Lubrication Tips
Proper lubrication keeps your can opener working smoothly. It reduces friction and prevents rust on moving parts. A well-lubricated can opener lasts longer and opens cans effortlessly.
Choosing The Right Lubricant
Use food-safe lubricants only. Mineral oil is a popular choice. Avoid cooking oils like olive or vegetable oil. They can become sticky and attract dirt. Silicone spray is another safe option. Always check the label for non-toxic and food-grade status.
How To Apply Lubricant Safely
Clean the can opener before applying lubricant. Use a cloth to remove dirt and food bits. Apply a small drop of lubricant on the gears and the cutting wheel. Turn the handles slowly to spread the oil evenly. Wipe off any extra oil to avoid mess.
Frequency Of Lubrication
Lubricate your can opener every few months or when it feels stiff. If you use it daily, check the lubrication monthly. Regular oiling keeps the opener smooth and prevents rust. Always dry the opener well after cleaning before oiling.
Credit: www.ekster.com
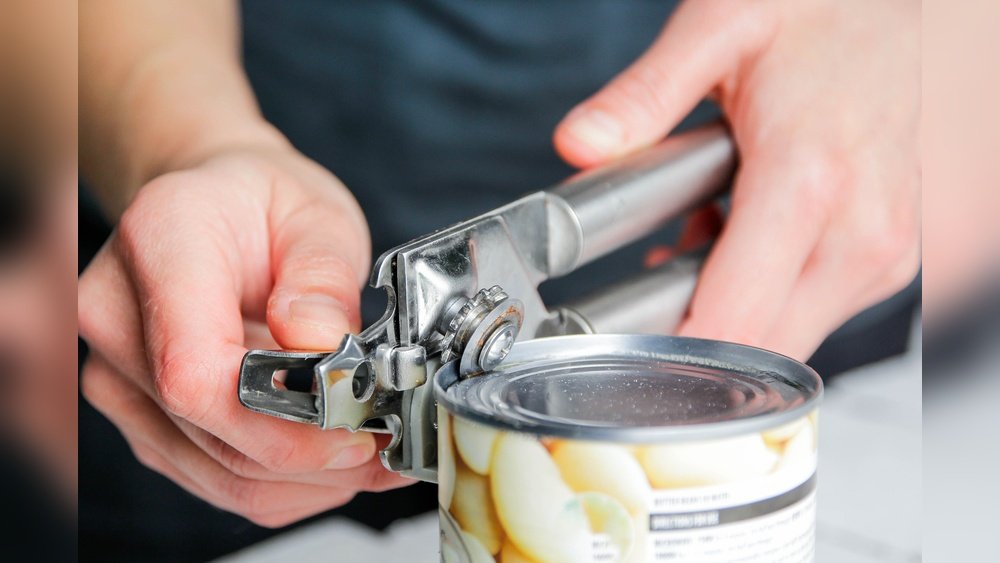
Blade Maintenance
The blade of a can opener is its most important part. Keeping the blade sharp and in good condition helps open cans easily and safely. Regular blade maintenance improves performance and extends the life of your can opener.
Sharpening The Cutting Wheel
The cutting wheel can become dull after frequent use. A dull blade makes opening cans harder and can cause slipping. Use a small, fine metal file or sharpening stone to lightly sharpen the blade. Turn the cutting wheel slowly while filing to keep an even edge. Sharpen the blade every few months or when you notice difficulty in cutting.
Replacing Worn Blades
Some can openers allow blade replacement when sharpening is not enough. Worn or damaged blades reduce cutting efficiency and can cause jagged edges on cans. Check your can opener’s manual for blade replacement instructions. Use only manufacturer-approved replacement parts. Replace blades as soon as they show signs of wear or rust.
Avoiding Damage During Use
Use the can opener properly to avoid damage to the blade. Avoid forcing the opener or twisting it too much. Open cans on flat, stable surfaces to keep the blade aligned. Clean the blade after each use to remove food residue. Store the can opener in a dry place to prevent rust and corrosion on the blade.
Storage Advice
Proper storage of your can opener extends its life and keeps it working smoothly. Storing it the right way avoids rust and damage. Follow these simple tips to protect your kitchen tool.
Keeping The Can Opener Dry
Always dry the can opener after cleaning. Use a clean towel to remove all moisture. Let it air dry fully before putting it away. Moisture causes rust and dulls the blade.
Proper Positioning To Prevent Moisture Build-up
Store the can opener in an open position. This allows air to circulate around the blade and gears. Avoid closing it tightly. Proper positioning stops moisture from collecting inside.
Avoiding Cluttered Drawers
Keep the can opener separate from sharp or heavy items. Cluttered drawers can damage its parts or cause injury. Use a designated spot or container for easy access and safety.
Credit: www2.parklanejewelry.com
Troubleshooting Common Issues
Troubleshooting common issues with your can opener keeps it working smoothly. Many problems have simple fixes. Regular care prevents damage and extends the tool’s life. Below are easy solutions for frequent problems.
Fixing A Stiff Turning Mechanism
A stiff turning mechanism makes opening cans hard. Dirt and food bits often cause this problem. Clean the gears and cutting wheel with a soft brush. Use warm soapy water to remove grime. Dry the parts completely to avoid rust. Apply a small drop of food-safe lubricant to the gears. Turn the handle several times to spread the lubricant evenly. This will make the turning smoother and easier.
Eliminating Squeaking Sounds
Squeaking sounds mean the can opener needs lubrication. Use a clean cloth to wipe the metal parts. Apply a drop of food-safe oil to the pivot points. Move the handle back and forth to work in the oil. Repeat if the squeak continues. Keep the opener dry after cleaning to stop rust and noise. Regular oiling keeps the can opener quiet and efficient.
Handling Rust Spots
Rust spots damage the can opener and make it unsafe. Remove rust by rubbing the affected area with a paste of baking soda and water. Use a soft brush or cloth for scrubbing. Rinse with warm water and dry completely. To prevent rust, always dry the opener after washing. Store it in a dry place. Rust removal and prevention keep the can opener safe and long-lasting.
Tips For Different Types Of Can Openers
Can openers come in several types. Each requires special care to keep working well. Proper maintenance extends their life and keeps them safe to use.
Below are simple tips for different types of can openers. Follow these easy steps to maintain your device.
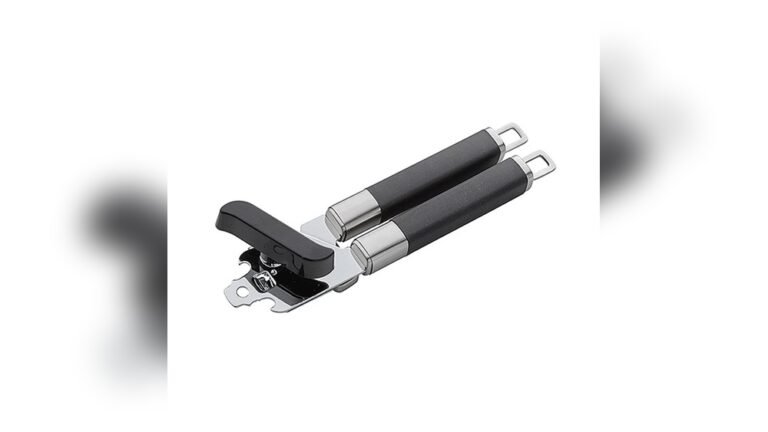
Manual Can Openers
Clean manual can openers after every use. Rinse the cutting wheel under warm water. Use a small brush to remove food bits from the gears. Dry completely to avoid rust. Apply a drop of light oil on the gears to keep them smooth. Store the opener in a dry place with handles open. This prevents moisture buildup and corrosion.
Electric Can Openers
Unplug before cleaning electric models. Wipe the exterior with a damp cloth. Remove the cutting assembly if possible for a thorough wash. Clean the blade and gear with warm soapy water. Dry all parts fully before reassembling. Check the power cord regularly for damage. Keep the motor area free from food crumbs to avoid jams.
Specialty Models
Specialty can openers need extra care. Follow the manufacturer’s cleaning instructions closely. Use mild soap and water on most parts. Avoid soaking electric or battery-operated sections. Lubricate moving parts lightly if recommended. Store these openers in a safe place to prevent damage. Regular checks help spot wear early and keep them working well.
Frequently Asked Questions
How To Lubricate A Can Opener?
Apply a few drops of food-safe mineral oil to the gears and cutting wheel. Turn the handle to spread oil evenly. Wipe off excess oil and let it air dry with handles open. This prevents rust and keeps the can opener working smoothly.
Can You Put Wd-40 On A Can Opener?
Yes, you can use WD-40 on a can opener to lubricate its gears. Apply sparingly, then wipe off excess to avoid food contamination.
Do You Need To Wash A Can Opener After Every Use?
Yes, wash your can opener after every use to remove food residue and prevent bacteria buildup. Rinse with warm water, dry thoroughly, and store it open to avoid rust. Regular cleaning keeps it safe and functioning smoothly.
How Long To Soak Can Opener In Vinegar?
Soak the can opener in vinegar for 10 to 15 minutes to loosen rust and grime. Then scrub and rinse thoroughly.
Conclusion
Proper care keeps your can opener working smoothly and safely. Clean it after each use to avoid buildup and rust. Dry it well and store with handles open for air circulation. Sharpen or replace blades if cutting becomes hard. Simple steps extend the life of your can opener.
Enjoy hassle-free kitchen tasks every time.